Monday, December 26, 2011

Crunchy Roasted Beets with Feta Cheese

Crazy Crunchy Roasted Beets with Feta Cheese and Balsamic dressing!!!


Ingredients

  • 5-6 beets (purple or yellow), greens removed, washed, peeled, and chopped
  • 2 celery's sticks thinly chopped
  • 2 bunches of watercress sprouts or baby arugula or any nice green mix
  • 1/2 cup of dried sweetened cranberries
  • 1 large red onion cut into slices with a mandolin
  • 10 Basil's leaves chopped
  • 1 cup feta cheese crumbled
  • 1/2 cup Walnuts toasted
  • Extra Virgin Olive Oil (I used my Nuovo fav)
  • Good Balsamic Vinegar....
  • Salt and Pepper

Preparation

Preheat oven to 400 degrees, on a baking sheet place a piece of foil, drizzle some olive oil on it, spread the beets in the foil, drizzle the beet with more olive oil, salt, and pepper. Place the beets in middle rack oven and roast the beets for about 45 minutes or until crunchy and soft. Remove from the oven and set aside until cool down.
Slice the red onions very thin (I used my mandolin). Toast the walnuts in a saute pan. How? Heat a large frying pan over medium high heat. Add walnuts to the hot, dry pan and cook, watching constantly and stirring frequently, until walnuts starts to brown and they smell toasted, about 5 minutes. Slice the celery's sticks very thin. Once you have all the ingredients place them in a bowl, season with salt and pepper ,and add the balsamic and olive oil, and basil and toss. This salad is amazing!! Leftover tasted even better next day....


This is my new addition!!
Next time I will make it with farro!! :P


Fresh is my mantra, and cooking my meditation time!

Sarabelle Sylva

Pasta Fagioli Soup

Pasta Fagioli
Pasta and Beans
Pasta Fazool

"Don't be a fool, eat pasta fazool."(*)
(from the 1927 novelty song by Van and Schenck)


I love beans! They are healthy, cheap, filling, and tasty! Beans are high in soluble fiber, low in fat, and has no cholesterol! Beans are an excellent source of protein, complex carbohydrates, and have only about 225 calories per cup. There is evidence that most beans contain protease inhibitors that inhibit the growth of cancer cells.

Cannellini Beans are large white beans, about 1/2" long, with a firm texture and skin and a nut-like flavor. Very popular in Italy. Cannellini beans are mild in flavor and hold their shape well.

I love cooking them from scratch! Homemade beans from scratch are much healthier than the canned ones. Beans from cans are usually full of sodium, metal flavor, and preservatives like disodium EDTA, calcium chloride, and sodium sulfate. Beans from cans are not fresh, they have been storage in the cans for long periods, and sometime they fermented inside the metal cans!! Don’t cheat to yourself eating beans from can!! Beans from made scratch are healthier and taste better too!! Canned beans taste like Canned beans!!

Also you save money making them from scratch. You can get 4 cups of cooked beans from a bag of dried beans from under 60 cents each cup, and you get one can of cooked beans from 90 cents to $1.50! You can make big batch and freeze them. Also you help the planet not wasting metal!! ;)

Some people have the misconception than making beans is a lot of work and they are hard to cook. But it is not true. One you make them one time your will realize how extremely easy it is to cook them from scratch.

Don’t cheat yourself eating beans because they are healthy if you are going to eat then from cans!!

I use 4 different methods to cook dried beans from scratch.

Method 1: Soak overnight and cook.
Cover beans with water (3 cups of water for every 1 cup of dry beans) and let them soak for 8+ hours or overnight. Discharge water using a colander. Now your beans are ready to cook. Easy!

Method 2: Boil beans, let them rest for about 1 hour, and cook.
Cover beans with water (4 cups of water for every 1 cup of dry beans), bring them to boil for about 10 minutes, turn them off, and leave them soaking in the water for 1 hour. Discharge water using a colander. Now your beans are ready to cook. Easy!

Method 3: Cook beans in a pressure cooker (no soaking involved)
Super Easy! I will use this method in future recipes.

Method 4: Cook beans overnight in a slow cooker.
Very Very Easy! I will use this method in future recipes.

Ingredients
 
1 bag of 1 pound dried cannellini beans (soaked overnight)
1-2 cartons of Organic Chicken stock or enough water to cover the beans.
3 Tbsp extra virgin olive oil for cooking
1 white onion, peeled and chopped
4 garlic cloves, peeled
1 large carrot, peeled and chopped
1 celery stalk, trimmed and chopped
8 sage leaves
2 branches of rosemary
2-3 branches of thyme
3 bay leaf
2 spoons of tomato paste (optional) or 2-3 fresh tomatoes peeled and cut in cubes. (Ups! I think I used more than 2 spoons of tomato paste this time)
1/2 cup of ditalini or elbow pasta
Salt and pepper 
Parmesan and Olio Nuovo for serving

Preparation

This time I used method 1.

The day before you cook the beans or early in the morning cover the beans with an inch of water or more (about 3 cups of water for every 1 cup of dry beans) and let them soak for 6+ hours. Discharge water using a colander. Now your beans are ready to cook.

Add olive oil in a large saucepan until medium hot. Saute onions until translucent, add pressed garlic, celery, and carrots. Add tomato paste or fresh tomatoes if you desire.  Add beans previously drained, and saute beans for 1 minute with the sauteed veggies. Add salt, and pepper to taste, chicken stock (or water), and herbs. Let it boil uncovered for 10 minutes, then reduced the temperature to low and cook covered for about 1 hour and 15 minutes or until beans are soft. One in a while stir the beans and check if there is enough liquid. Add water or chicken stock if necessary.

Add the pasta ditalini or elbow and cook for extra 10-12 minutes. Make sure there is plenty of liquid because the pasta will reduce and absorb a lot of the liquid.

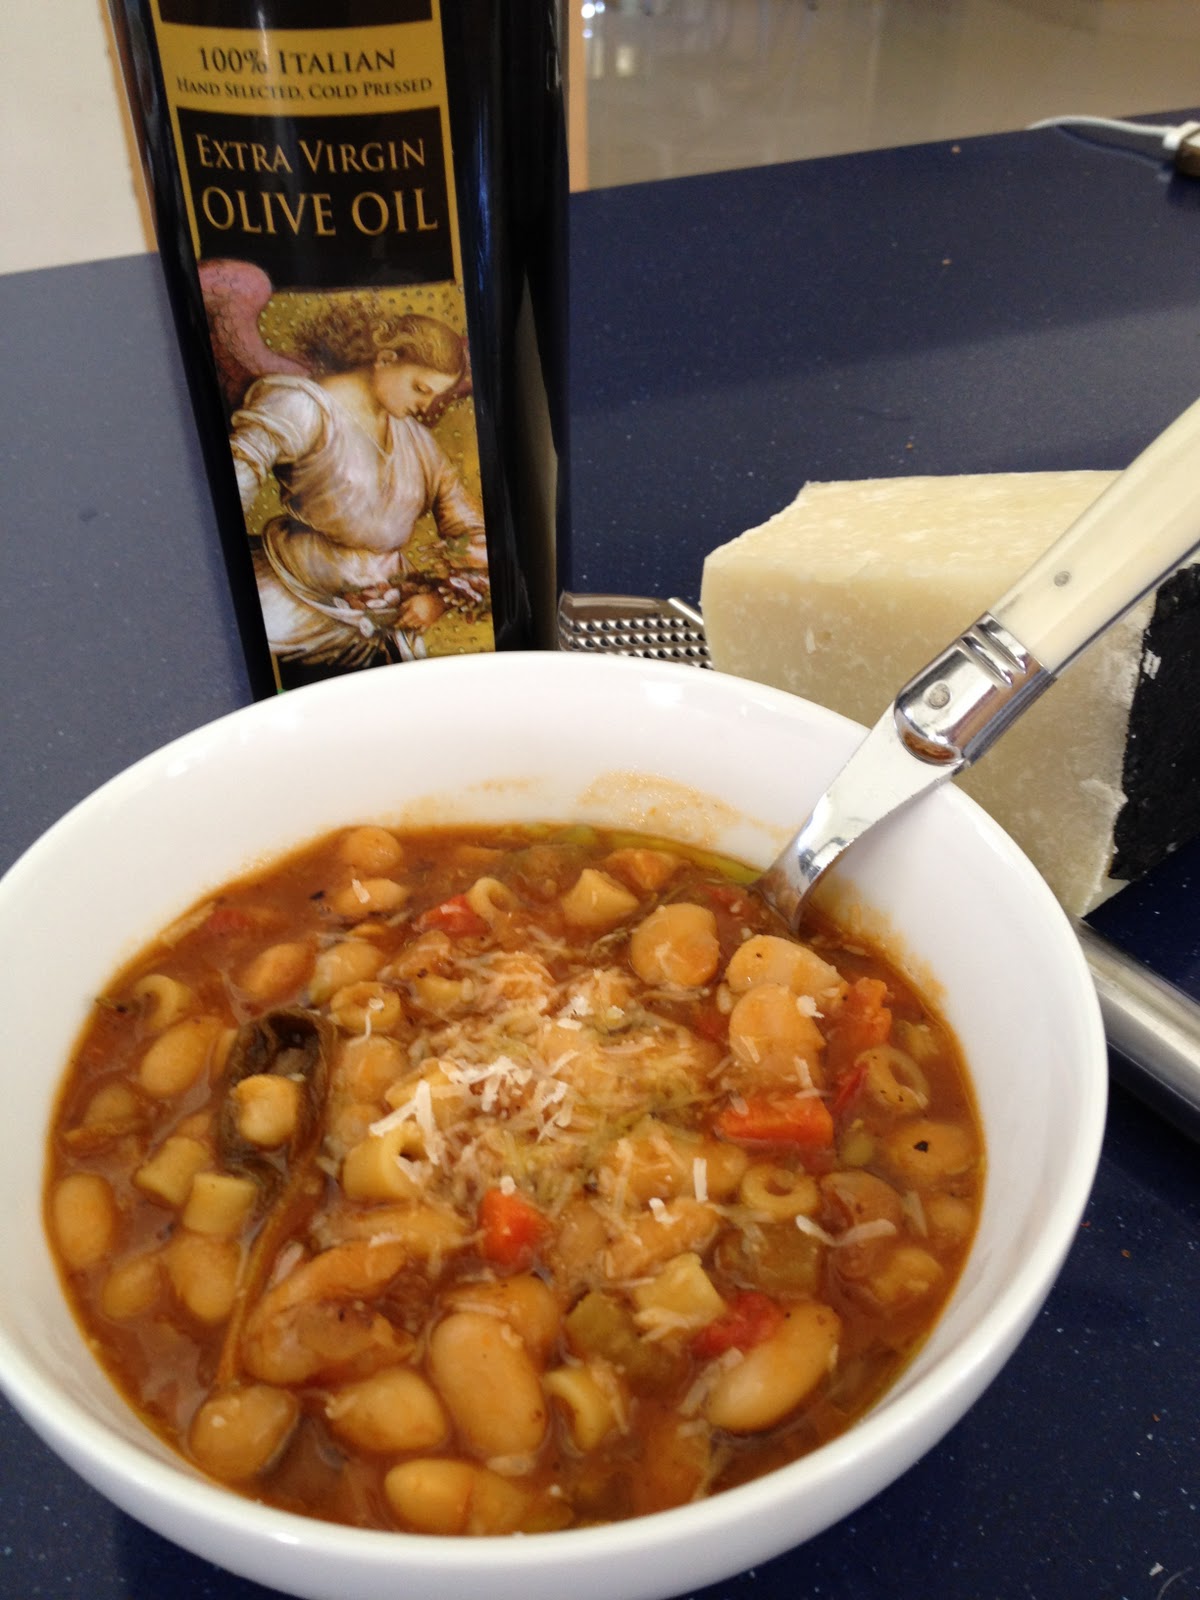
Serve with Parmesan cheese and drizzled with Olio Nuovo or best extra virgin olive oil you have.


Now that's amore!! "When the stars make you drool, joos-ta like pasta fazool, that's amore". (From the Dean Martin song)


Buon appetito!!

Sarabelle Sylva


(*)(The Italian adjective fasullo/fasulla/fasulli/fasulle, meaning "fake" or "bogus", has a very similar pronunciation; but has no connection to "fazool".)

Monday, December 19, 2011

Poor Man's Caviar - Eggplant Spread

Poor Man's Caviar:
Eggplant Spread


Feeding my cells with Eggplants
and Nuovo Olive Oil!!


Eggplants are one of my favorite vegetables!!
There is so many ways to enjoy them: grilled, baked, fried, sautéed roasted or steamed.
Eggplants have so many health benefits.
They are excellent source of fiber, Vitamin B6, B1, potassium, copper, magnesium, manganese, phosphorus, niacin, and folic acid.
Eggplants are full of antioxidants!!  
The most important phytonutrient in eggplant is nasunin.
Nasunin protects cell membranes from free radical damage.
Also eggplants contain a compound called terpenes, which are known to lower cholesterol.
Eggplants are 100% fat free and a cup of egg plants is only 27 calories!!
Beside all the health benefits I don't think there is a better combination than eggplant and olive oil!!

Are you convinced yet??
If you are not maybe trying this recipe
may change your mind about eggplants!!


I will be posting more recipes of eggplants in the near future!! :)

Ingredients:

3 medium eggplants
4 tbsp. of Olio Nuovo EVOO or best EVOO you got
1 medium red or white sweet onion cut in big pieces
cloves garlic
1/2 red bell pepper
1/2 lemon, juice only
Parsley
Salt
Pepper


Preparation:

Stab the eggplants with a fork or a sharp knife all over their skin. Cover a cookie sheet tray with foil paper or paper parchment. Preheat the oven in roast option on 450F. Place the eggplants in the oven and roast them for 45-60 minutes. Rotate the eggplants once or two while they are in the oven. They will look almost black and wrinkled. Take them out of the oven and let them rest for 10-15 minutes untill they cool down. Peel the eggplant and cut the flesh in pieces. Dischange the skin. If the eggplants are very soft, scoop out the fresh. Add the cooked fresh and its juice in a food processor. If you don't have a food processor you may use a blender or chop everything by hand. Add onion, garlic, red pepper, lemon juice, salt, and pepper to the food processor. Pulse the food processor several times until you grind all the ingredients. Transfer the mixture to a serving dish and drizzle it with olive oil. Taste for salt and peppers. You may spread the eggplant caviar on toasted bread or eat it by itself as a side dish!!

The seeds of the eggplant will make
the spread resemble caviar eggs,
hence the name Poor Man's Caviar.
:):):)

Hope you enjoy it as much as I do!
Sarabelle <3


Saturday, December 17, 2011

Pan con Tomate with Nuovo Oil

Pan con tomate
Pa amb tomàquet
 Spanish Style Toast with grated Tomato
Bruschetta al Pomodoro

Pan con tomate also called Pan a la Catalana is originally from Spain. It is one of the most simplest and famous dishes from Cataluña, Spain. The original way to do pan con tomate is to slice a ripe tomatoes in half, grill a piece of toasted bread, rub garlic and half of the ripe tomato into the bread, and drizzled with olive oil, and salt. That IT!
It is mostly eaten for breakfast in Spain but it is also seen as very popular bar tapa. It is a great appetizer or it can be a great healthy snack at any time of the day!
Bread, tomato, and olive oil make for an amazing treat – morning, noon, or night.

Its great flavor is addicted and you will want to recreate it over and over again! 


Ingredients
(One portion only)
  • A slide of a good rustic solid dense bread (I used Tuscan bread)
  • A Medium size Tomato
  • 1-2 cloves of garlic (I love garlic)
  • 2 tablespoons of Nuovo Olive Oil or Best Olive Oil you have (I used L'arte dell' Olivo)
  • Fresh ground black pepper (optional)
  • Sea Salt Flakes.

Preparation

  1. Place the box grater inside a large bowl and grate the tomato on the biggest holes, and discharge the skin.
  2. Add olive oil and pressed garlic into the grated tomato.
  3. Pan grilled the bread (you could also oven broil, bake, toast, charcoal grill, or any method you want to toast your bread).
  4. Spoon grated tomato onto the toasted bread, sprinkle with salt, drizzle with more olive oil, and add fresh ground black pepper to finish!


You can top a traditional pan con tomate with almost anything to create a new savory sensation.

Sarabelle Sylva

Tuesday, December 13, 2011

Pici - A hand made pasta

Pici! Pici! Pici!

This is a very relaxing recipe....
and
Pici Pici Pici is My Mantra!! :D

Pici is a handmade pasta originally from Tuscany. It is called food of the poor. I will say that it is the food of a hard worker poor! The ingredients are minimum but a lot of rolling by hand in here! It is a hard labor food... but if you know me, you know why I think it is very relaxing! :)

Pici it is very similar to stringozzi from Umbria!!

Great recipe for a Saturday morning to keep you and your kids busy!!! ;)


Ingredients
  • 2 cups semolina flour and more for dusting.
  • 2 cups all purpose flour and more for dusting.
  • Salt
  • 1 to 1 1/4 cups tepid water
  • Tablespoon of EVOO. I used Tuscany Nuovo Oil from L'arte dell' Olivo 2011 Harvest.

Preparation

  1. Put both flours in a bowl, add olive oil, salt, and little water at a time, and mix with your hands until you form an elastic and homogeneous dough. Remember add the water little at a time to prevent the dough to be sticky. You may use more or less water depending of your kitchen humidity. Don't add all the water at the same time. Add more water if necessary.
  2. Make a ball with the dough, oil the ball lightly with olive oil, and let it rest for about half an hour covered with a kitchen tablecloth at room temperature.
  3. Dust the working surface with flour and using a rolling pin roll the dough until you create a disc of about one inch (2cm) thick. Spread some oil on top.
  4. Using a knife cut strips of 1cm wide. Hold each end with your hands and start rolling the strips with your hands. Hold one end with one hand and roll with the other hand. Roll back and forth until you create a spiraled snake like a noodle. Each strands should be about 18 inches long and as narrow and even you can. Don't worry if some of the strands are shorter. Just try to make them have the same thickness. Dust a tray with semolina and place your picis there. To avoid them to stick together make sure to dust them with semolina. Cover the picis with a towel until ready to use. You could also freeze the picis for several months.
We ate our picis fresh righ after we made them today with fresh sliced galic, Olio Nuovo, and fresh chopped sage, oregano, and basil from my garden... So good and fresh!!!


Sunday, December 11, 2011

Chimichurri Sauce My Way!


Chimichurri is a green sauce originally from Argentina usually eaten with grill meats or use to marinade meats. It is also very popular in Uruguay, Nicaragua, Colombia, and Mexico. The base is parsley, garlic, and olive oil but each country has their own variations. My recipe also is different from others because I use carrots and red bell pepper which give a crispy spicy sweetness to it.
The origin of the name is unclear. Some Argentinean said that the name came from English prisoners after the invasion of the Rio de la Plata in 1806. The prisoners used to ask for the delicious sauce mixing Spanish-Argentinean and English word "che mi curry", a way to ask for give me curry or give sauce. Others think the word came from a English person nick name 'Jimmy McCurry'. Who knows and who cares? The only thing I know is that after you try grilled meat with chimichurri you can't never eat meat without it!! :) Also it can be eaten with toasted bread, empanadas, etc. After keeping the chimichurri for a week or more in the refrigerator you can also use it to marinate chicken, fish, etc.


Chimichurri with grilled entranas....

Ingredients:

1 large bunch parsley leaves
6-8 cloves garlic
1 lime (juice only)
2/3 cup Extra Virgin Olive Oil
1/2 of a red pepper unseeded
1/2 of a medium carrot in small pieces
A dash of red pepper flakes (be careful)
salt and pepper to taste
1/4 cup white vinegar (optional)
1/2 Fresh Oregano (optional)


Preparation:

My super easy way is to put everything except the olive oil in a food processor or blender and pulse on and off until you chopped everything. Do not over chopped it. Adjust flavor tasting it until it makes you happy! :) Remove from the food processor, place it in a glass bowl, add the olive oil, and whisk all together. Don't be cheap with the olive oil, the more the better! Add salt, pepper, more vinegar and lime juice as needed. Cover with olive oil before saving it in the refrigerator!!


Hope you like it! :D

Sarabelle Sylva

Wednesday, December 7, 2011

Cheesy Bacon Stuffed Poblano Peppers


Poblano peppers are a mild type of hot peppers originally from Puebla, Mexico. They are pretty easy to find in the supermarkets in the USA. They are much more soft than jalapenos but much more spicy that a regular green bell pepper. They are dark green and some of them almost black.

The other day I was in the mood of eating stuffed hot pepper. I made first sharp cheddar cheese stuffed jalapenos wrapped with bacon on the grill and they came out sooooo good (I will post that recipe too later in this blog). Because jalapenos are so small and we ate them so fast,  I decided next day to stuff a bigger type of a spicy pepper and that's how I end out creating this super easy recipe.

This was my first time stuffing poblanos with cheese. So initially I started cooking them on the grill and I saw that all the cheese was coming out, I transferred them from the grill to the oven and end out cooking them on broil. 

I love to stuff Poblanos with ground beef. I always made them in July for the Mexican Independent Day. They are a lot of work too. But this recipe it very easy and I am sure you are going to love it!

Anyway since this recipe came out so good I decided to write it down and share it with you today and I also wanted to document it  for me to do it one more time in the future! :)

I hope you enjoy My Cheesy Bacon Stuffed Poblanos!! :)


Ingredients:

5-6 Poblano Peppers cleaned 
Medium Onion chopped
1/2 pack of center cut bacon cut in small pieces
4 garlic's cloves
Fresh ground pepper
8 oz pack of cream cheese room temperature
Cheddar Cheese fresh shredded (I shredded a bunch of different cheddar cheeses I had open in the refrigerator one of it was cabbot cheddar with jalapenos and even added a small piece of goat cheese)

Preparation:

You may use gloves to avoid to get burn (I didn't. So I got burned all over my face, lips... and all parts of my body I touched hahahu!! huh?). Wash the peppers, pad dry them with pepper towel, cut the top and reserve it, remove seeds, and remove carefully the stems from inside the pepper with a knife, and set aside. 
Saute bacon until crispy, add onions, squeeze garlic, and cook it until the onion get translucent. Set a side this mixture and wait until it get to room temperature.
Mix together cream cheese, cheddar cheese, and the onion bacon saute mixture. Add pepper. Mix all together with a fork. Fill the peppers one by one and close the top with 2 wood tooth sticks nicely.You can leave them in the refrigerator and cook them later or next day.
When ready to cook, place them in a tray covered with foil paper. Set one of the oven rack all the way to the top and preheat the oven on HI Broil. Cook about 2-3 minutes on each side. Remove them from the oven, wait few minutes, and EAT them!! Now I got a run to pick up my girls from school and take them to extra activities!! Hope you enjoy it!! I <3 you all!! ;) Sarabelle

This is the final result.....


Tuesday, November 1, 2011

Citrus Cake made with Extra Virgin Olive Oil

Why Olive Oil and Not Butter??

Because olive oil contains vitamin E, it helps to naturally maintain the freshness of baked goods and creates moist cakes. Olive oil in the batter is the secret to a moist and tender cake!! Also Olive oil cuts back on the cholesterol and saturated fat content of desserts!! So why not? :D

Ingredients
  • 3/4 cup extra virgin olive oil
  • plus additional olive oil for greasing pan
  • 1 1/2 teaspoon of grated orange or lemon zest
  • The juice of a orange (about 1/4 cup) or 1 1/2 tablespoon of lemon juice
  • 1 cup all purpose flour (not self-rising)
  • 5 eggs yolks
  • 4 egg whites (1 egg white from the 5 eggs wont be used in this recipe)
  • 1/2 teaspoon salt
  • 3/4 cup sugar
  • 1 1/2 tablespoons sugar
  • 1/4 cup limoncello
  • 4 tablespoons powdered sugar, sifted
Preparation

Put oven rack in middle position and preheat oven to 350°F. Grease pan with some olive oil and line bottom the pan with parchment paper. Oil parchment paper.

Beat together all 5 eggs yolks and 1/2 cup sugar in a large bowl with an electric mixer at high speed until thick, about 4 minutes.

Reduce speed to medium and add the olive oil and the orange/lemon juice until mixture in combined. Using a silicone or wooden spoon, stir in flour mixture until just combined. Do not beat.

Clean the beaters and in medium-high speed beat egg whites with salt in another large bowl until foamy. Then add sugar little by little at a time, beating, and continue to beat until egg whites just hold soft peaks, about 3 minutes.

Gently fold the whites mixture into yolk mixture, mix one third of the whites then fold in remaining whites gently but thoroughly. Add the grated orange or lemon zest and mix.

Transfer batter to the pan and gently rap against work surface once or twice to release any air bubbles.

Sprinkle top evenly with remaining 1 1/2 tablespoons sugar.

Bake until puffed and golden and a wooden pick or skewer inserted in center of cake comes out clean, about 45 minutes.

Cool cake in pan for 10 minutes, then run a thin knife around edge of pan and remove from the pan.

Cool cake to room temperature, about 1 1/4 hours.


Optional for Serving
Heat limoncello in a small saucepan and whisk in powdered sugar until dissolved. Drizzle over cake slices before serving.

*** This recipe I found it and modified from the internet ***

Monday, October 31, 2011

Arepas Saborizadas con Pesto, rellenas con Ensalada Caprese y Prosciutto

Esto fue un invento que se nos ocurrió ayer.... quedaron deliciosas!!


Ingredientes
1 taza de harina de maíz
2 tazas de agua tibia
3 cucharadita de sal
Pesto
Queso mozzarella
Tomate en rodajas
Hojas de Albahaca
Prosciutto
Aceite de Oliva

Preparación
Preparar la masa a su gusto. La manera que yo la preparo es la siguiente. Coloco agua tibia con sal en un bol y voy adicionando la harina poco a poco disolviendo la harina con el agua hasta lograr la consistencia deseada. De esta manera no se forman grumos. Todo a mano. Después agregarle 1 o dos cucharadas de pesto dependiendo del gusto. Amasar con las manos bien y hacer pelotas de masa del tamaño deseado e ir aplastando con la planta de la mano dándole vueltas. Arreglar el círculo que no queden grietas. Colocar las arepas en un plato y cubrir con un papel toalla húmedo.
Colocar la rejilla del horno justo en el medio y precalentar el horno a 350F.
Calentar un sartén de teflón o un budare (plancha de hierro) bien caliente y engrasar con aceite de oliva. Colocar las arepas y esperar unos 4-5 minutos que doren, mover el sartén con la mano de atrás hacia delante hasta que la arepas se mueven y rotar y dorar la otra cara.
Colocar las arepas en el horno por 30 minutos aproximadamente hasta que abomben.
Sacarlas con cuidado y envolver en una toalla de cocina para que se permanezcan calientitas.
Rellenarla con pesto, mozzarella, prosciutto y albahaca.

Buen Provecho :)

Sarabelle

Wednesday, October 26, 2011

Shrimp Ceviche Avocado Tostadas

This is a very refreshing dish! Great for the summer or all year around!! Super easy to make and very impressive!
I chose to make it today because I am feeling my throat a little bit funny and felt like eating something spicy!! Hope you make it and enjoy it!
Sarabelle <3


 Ingredients
  • 1.5 pound bag of Large Shrimps peeled, deveined, and tail on.
  • 1 tbsp sea salt
  • 3/4 Cup freshly squeezed lime juice
  • 1 tbsp Aji Amarillo paste (start with 1/2 and taste)
  • 1/4 Cup extra virgin olive oil ;)
  • 1/2 small red onion cut in thin strips
  • 1 Red/Yellow/Orange Bell Pepper cut in slices
  • 1/2 bunch cilantro, chopped
  • 1 avocado, peeled, seeded and cut in 1/2 thin slices
  • Corn Tostadas (They are corn tortillas fried)
  • Salt and freshly ground black pepper, to taste
  • Any other crispy veggie you like.... I will add radish!! :)

Preparation

Prepare a deep saucepan with enough water to cook the shrimp. Clean shrimps in cold water and remove the tails. Prepare a big bowl with ices and cold water. When the water start boiling, add sea salt, and dump the shrimp in the boiling water carefully. As soon as they all get pink about 1-2 minute (do not over cook the shrimp), strain the shrimp in a colander, and place them in the bowl with the icy cold water to stop them from cooking! In another bowl whisk together the aji amarillo paste, olive oil, and lime juice. Remove shrimp from the cold water. In a rectagular Pyrex dish (or something similar) combine the shrimps, oil mixture, onion, bell pepper, radish, cilantro, and green onions. You can serve inmediatly since the shrimps must be cold from the icy water or you can save it for later in the refrigerator. Serve on top of a crispy tostada with slices of avocados!! Finish it drizzling with your favorite extra virgin olive oil!! :)